| [Paul's Sketchbook] Photoblog of Awesome | |  |
|
| Message | Author |
|---|
Re: [Paul's Sketchbook] Photoblog of Awesome
 By Rolly. 13/12/12, 02:40 am By Rolly. 13/12/12, 02:40 am
|
| | Have you tried ironing the creases on low, with some brown paper inbetween? It might loosen up the vinyl a little and make the creases disappear. |
| 
Rolly
forum prisoner.
Number of posts : 2918
Age : 33
Location : Auckland!
Transforms into : a stylish shoe for the blind earthbender
Gender : Female
Registration date : 2008-03-24
![[Paul's Sketchbook] Photoblog of Awesome - Page 2 Vide](https://2img.net/i/fa/vide.gif) |
| | |
|
Re: [Paul's Sketchbook] Photoblog of Awesome
By Seakittens. 13/12/12, 02:43 am
|
| | I'm more looking for pleather anyway. I remember someone saying to have a shower and hang it up in the room? Something about the hot steam loosening up the fabric and it gets rid of creases but it could be for something else. |
| 
Seakittens
EPICLY EPIC
Number of posts : 522
Age : 31
Location : Wellington
Transforms into : Ranka~!!
Gender : Female
Registration date : 2011-07-05
|
| | |
|
Re: [Paul's Sketchbook] Photoblog of Awesome
By Paul. 13/12/12, 03:33 am
|
| ^ I read somewhere online that you should never attempt to iron vinyl/PVC/PU fabrics as it would cause the coating to come away from the fabric backing.
I could try on a scrap and see what happens.
Exposing it to steam would work on regular cotton fabrics but probably not this? |
| 
Paul
Almighty
Number of posts : 395
Age : 38
Transforms into : Pokemon Trainer
Gender : Male
Registration date : 2008-09-07
|
| | |
|
Re: [Paul's Sketchbook] Photoblog of Awesome
By Paul. 24/12/12, 04:43 am
|
| ~~ Page 3
Lucario’s pants are now done. With the exception of making the upper legs narrower as was suggested by the designer. I am going to leave that for a bit.
![[Paul's Sketchbook] Photoblog of Awesome - Page 2 Ref_by_paul375-d5mwep4](https://2img.net/h/fc09.deviantart.net/fs71/f/2012/336/0/5/ref_by_paul375-d5mwep4.jpg)
I tried a technique to help with the topstitching. Sew though a strip of tear away stabilizer (I read that online. Searched it on ebay and brought what showed up. It’s like thick tissue paper). This allows the sewing machine foot to slide over the fabric. Vinyl and PVC type fabrics will want to stick to the metal parts of the sewing machine and make your life difficult.
![[Paul's Sketchbook] Photoblog of Awesome - Page 2 Stabaliser_by_paul375-d5p1k5e](https://2img.net/h/fc06.deviantart.net/fs71/f/2012/358/1/2/stabaliser_by_paul375-d5p1k5e.jpg)
It makes it much easier and afterwards tear it off one side of the stitching then the other side pulls out. There was a small amount of fluff remaining it a few places but it was easy to pick out. The only downside I could see was it makes the stitching a bit loose as it had to go through a additional thickness.
Using a decent camera this time, it actually shows the blue colour correctly.
![[Paul's Sketchbook] Photoblog of Awesome - Page 2 Lucario_3_by_paul375-d5p1jes](https://2img.net/h/fc05.deviantart.net/fs70/f/2012/358/f/7/lucario_3_by_paul375-d5p1jes.jpg)
![[Paul's Sketchbook] Photoblog of Awesome - Page 2 Lucario_2_by_paul375-d5p1jer](https://2img.net/h/fc08.deviantart.net/fs70/f/2012/358/9/a/lucario_2_by_paul375-d5p1jer.jpg) ![[Paul's Sketchbook] Photoblog of Awesome - Page 2 Lucario_1_by_paul375-d5p1je5](https://2img.net/h/fc03.deviantart.net/fs71/f/2012/358/a/6/lucario_1_by_paul375-d5p1je5.jpg)
(Still debating if its worth fixing the problem where the inside part of the pocket got cauget then sewing down the waist band. It’s tiny so should be ok as is.)
~ Holiday Diary ~
So I managed to get two weeks off work. I hope to make good progress on Cosplay during this time.
Day 1
Finished off Pokemon Ranger Kellyn Jacket.
After putting it to the side for quite a while I have got back onto Pokemon Ranger Kellyn’s Jacket for a friend.
First try at making shoulder pads. They worked out ok.
![[Paul's Sketchbook] Photoblog of Awesome - Page 2 Kellyn_1_by_paul375-d5p1j6g](https://2img.net/h/fc01.deviantart.net/fs71/f/2012/358/8/d/kellyn_1_by_paul375-d5p1j6g.jpg)
Lining in, Front opening finished off and buttons attached.
It was requested that I make the collar really thick. I thought that would be a battle to achieve.
![[Paul's Sketchbook] Photoblog of Awesome - Page 2 Kellyn_2_by_paul375-d5p1j6l](https://2img.net/h/fc08.deviantart.net/fs71/f/2012/358/0/5/kellyn_2_by_paul375-d5p1j6l.jpg)
But it turned out ok. I was afraid the creases on the inside edge would made it bad but they told me they liked that. (At first I was considering ways of making the collar out of three parts: Outer strip, (Shorter) Inner Strip and a specially curved strip to go along the top edge. So that it could give a perfect curved shape with sharp corners and no wrinkling.)
Sleeve ends finished and bottom edge finished.
![[Paul's Sketchbook] Photoblog of Awesome - Page 2 Kellyn_3_by_paul375-d5p1j6o](https://2img.net/h/fc04.deviantart.net/fs70/f/2012/358/d/b/kellyn_3_by_paul375-d5p1j6o.jpg) ![[Paul's Sketchbook] Photoblog of Awesome - Page 2 Ref_by_paul375-d5mwe8t](https://2img.net/h/fc04.deviantart.net/fs70/f/2012/336/5/e/ref_by_paul375-d5mwe8t.jpg)
Now all I have to do on this is make shoes. They will wait until I get some more done on my other projects.
Day 2
- Wasted a lot of time not working on Cosplay -
Fixed up Zajis Pants.
I removed the bands from the ends of the legs and opened up the inner leg seams.
I cut out two triangles and stitched them in.
![[Paul's Sketchbook] Photoblog of Awesome - Page 2 Zaji_pants_1_by_paul375-d5p1j5y](https://2img.net/h/fc07.deviantart.net/fs70/f/2012/358/4/4/zaji_pants_1_by_paul375-d5p1j5y.jpg)
![[Paul's Sketchbook] Photoblog of Awesome - Page 2 Zaji_pants_2_by_paul375-d5p1j63](https://2img.net/h/fc00.deviantart.net/fs70/f/2012/358/b/7/zaji_pants_2_by_paul375-d5p1j63.jpg)
(This is the first time I have topstitched the inside leg seam, it gives a nice result)
Now the legs get progressively wider.
Reattached the bands.
![[Paul's Sketchbook] Photoblog of Awesome - Page 2 Zaji_pants_3_by_paul375-d5p1j68](https://2img.net/h/fc05.deviantart.net/fs71/f/2012/358/1/8/zaji_pants_3_by_paul375-d5p1j68.jpg)
Each pin is holding a small fold.
Bands on.
![[Paul's Sketchbook] Photoblog of Awesome - Page 2 Zaji_pants_4_by_paul375-d5p1j6c](https://2img.net/h/fc05.deviantart.net/fs70/f/2012/358/b/7/zaji_pants_4_by_paul375-d5p1j6c.jpg)
Comparing to earlier, the legs are billowing out nicely now. Just how they should.
![[Paul's Sketchbook] Photoblog of Awesome - Page 2 Zaji_pants_5_by_paul375-d5p1j6d](https://2img.net/h/fc07.deviantart.net/fs70/f/2012/358/b/e/zaji_pants_5_by_paul375-d5p1j6d.jpg)
![[Paul's Sketchbook] Photoblog of Awesome - Page 2 Zaji_1_by_paul375-d5p1m93](https://2img.net/h/fc04.deviantart.net/fs70/f/2012/358/e/c/zaji_1_by_paul375-d5p1m93.jpg)
--
The plan for this week is to get some of the annoying things done or at least started:
- Gloves for: Brick, Ash and Zaji
- Shoes for: Ash and Zaji and Start designing Lucatio’s too
- Other things for Zaji: Scarf and Hat |
|
Paul
Almighty
Number of posts : 395
Age : 38
Transforms into : Pokemon Trainer
Gender : Male
Registration date : 2008-09-07
|
| | |
|
Re: [Paul's Sketchbook] Photoblog of Awesome
By brunetteyes. 24/12/12, 04:52 am
|
| Looks like you've gotten back into sewing 
Is the Pokemon Ranger Kellyn for someone else?
I'm impressed with your work with vinyl! It looks very cool!! |
| 
brunetteyes
EPICLY EPIC
Number of posts : 636
Age : 33
Gender : Female
Registration date : 2009-09-22
|
| | |
|
Re: [Paul's Sketchbook] Photoblog of Awesome
By Paul. 24/12/12, 06:51 am
|
| ^ Thanks 
I am kind of back into it. It seems having more time results in less motivation compared to having a short amount of time each weeknight.
Pokemon Ranger Kellyn is for the guy who designed the Lucario Gijinka, http://radenwa.deviantart.com/  |
|
Paul
Almighty
Number of posts : 395
Age : 38
Transforms into : Pokemon Trainer
Gender : Male
Registration date : 2008-09-07
|
| | |
|
Re: [Paul's Sketchbook] Photoblog of Awesome
By EternalOutsider. 26/12/12, 09:11 am
|
| | Stunning! |
| 
EternalOutsider
Tophat
Number of posts : 146
Age : 41
Location : West AK
Transforms into : David Xanatos
Gender : Male
Registration date : 2012-09-29
|
| | |
|
Re: [Paul's Sketchbook] Photoblog of Awesome
By Paul. 31/12/12, 03:07 am
|
| ^ 
~ Holiday Diary ~
Day 3
Started making gloves for Ash and Brick. Only got as far as cutting out some fabric.
Day 4 (Christmas Day :- )
Started to make a better version of the pattern I made for shoe covers. This is in preparation to make shoes for Ash.
Day 5 (Boxing Day), Day 6, Day 7
No cosplay work done But! I got hold of a choice 1” Open Reel Video Recorder to add to my collection and cleaned it all up.
![[Paul's Sketchbook] Photoblog of Awesome - Page 2 Vtr_by_paul375-d5ptmqv](https://2img.net/h/fc02.deviantart.net/fs71/f/2012/365/7/2/vtr_by_paul375-d5ptmqv.jpg)
Missing a required circuit board so can’t try it out. There is a possibility of getting the board though. So there is hope of getting this 36kg, 30 year old thing going.
Photos of it are here if you are interested: http://sta.sh/2qu2gezpgmb
Day 8
Working on Gloves for Ash and Brick.
Previously for Brick I was using gloves for Pokemon Trainer Red (have a white band on them) Now I will make some more accurate ones that are all black.
These start off very similar to Lunicks gloves but they are a bit more basic.
Finishing finger ends
![[Paul's Sketchbook] Photoblog of Awesome - Page 2 H01_by_paul375-d5ptmkh](https://2img.net/h/fc06.deviantart.net/fs71/f/2012/365/5/f/h01_by_paul375-d5ptmkh.jpg)
Ready for band to be attached
![[Paul's Sketchbook] Photoblog of Awesome - Page 2 H02_by_paul375-d5ptmkn](https://2img.net/h/fc09.deviantart.net/fs71/f/2012/365/1/e/h02_by_paul375-d5ptmkn.jpg)
Bricks are all black.
![[Paul's Sketchbook] Photoblog of Awesome - Page 2 Brick_by_paul375-d5pto5f](https://2img.net/h/fc00.deviantart.net/fs71/f/2012/365/6/1/brick_by_paul375-d5pto5f.jpg)
Brick’s are finished but Ash’s still need the red band finished off.
![[Paul's Sketchbook] Photoblog of Awesome - Page 2 H03_by_paul375-d5ptmku](https://2img.net/h/fc00.deviantart.net/fs70/f/2012/365/5/1/h03_by_paul375-d5ptmku.jpg)
![[Paul's Sketchbook] Photoblog of Awesome - Page 2 H04_by_paul375-d5ptml2](https://2img.net/h/fc02.deviantart.net/fs70/f/2012/365/7/9/h04_by_paul375-d5ptml2.jpg)
For Ash gloves there is a red band instead of black.
![[Paul's Sketchbook] Photoblog of Awesome - Page 2 Ash_by_paul375-d5ptpak](https://2img.net/h/fc04.deviantart.net/fs71/f/2012/365/e/d/ash_by_paul375-d5ptpak.png)
Day 9
Ash gloves were finished.
![[Paul's Sketchbook] Photoblog of Awesome - Page 2 H05_by_paul375-d5ptmlg](https://2img.net/h/fc02.deviantart.net/fs70/f/2012/365/f/d/h05_by_paul375-d5ptmlg.jpg)
Now I started to make gloves for Zaji.
These are full finger coloured brown. A bit like this
![[Paul's Sketchbook] Photoblog of Awesome - Page 2 Glove_by_paul375-d5ptopx](https://2img.net/h/fc02.deviantart.net/fs70/f/2012/365/b/2/glove_by_paul375-d5ptopx.jpg)
So far I have only ever made half finger gloves so this is something new and interesting. I started by making a prototype to ensure the pattern I invented was ok. The pattern was made from looking at my Roy Mustang gloves.
![[Paul's Sketchbook] Photoblog of Awesome - Page 2 H06_by_paul375-d5ptmll](https://2img.net/h/fc08.deviantart.net/fs70/f/2012/365/5/6/h06_by_paul375-d5ptmll.jpg)
The second attempt turned out largely ok but I need to sort out the shape of the thumb, width of the fingers and the finishing of the finger tips.
![[Paul's Sketchbook] Photoblog of Awesome - Page 2 H07_by_paul375-d5ptmm9](https://2img.net/h/fc00.deviantart.net/fs70/f/2012/365/3/c/h07_by_paul375-d5ptmm9.jpg) |
|
Paul
Almighty
Number of posts : 395
Age : 38
Transforms into : Pokemon Trainer
Gender : Male
Registration date : 2008-09-07
|
| | |
|
Re: [Paul's Sketchbook] Photoblog of Awesome
By Paul. 06/01/13, 11:56 am
|
| ~ Holiday Diary ~
Day 10
Working on gloves for Zaji.
Third prototype made, this is better. Got the widths of the fingers right.
![[Paul's Sketchbook] Photoblog of Awesome - Page 2 20_by_paul375-d5qkgev](https://2img.net/h/fc01.deviantart.net/fs70/f/2013/005/b/b/20_by_paul375-d5qkgev.jpg)
Start with actual fabric, brown Drill
![[Paul's Sketchbook] Photoblog of Awesome - Page 2 21_by_paul375-d5qkgf2](https://2img.net/h/fc05.deviantart.net/fs71/f/2013/005/8/e/21_by_paul375-d5qkgf2.jpg)
![[Paul's Sketchbook] Photoblog of Awesome - Page 2 22_by_paul375-d5qkgf9](https://2img.net/h/fc09.deviantart.net/fs70/f/2013/005/f/b/22_by_paul375-d5qkgf9.jpg)
No messing around, its all machine sewn.
![[Paul's Sketchbook] Photoblog of Awesome - Page 2 23_by_paul375-d5qkgfc](https://2img.net/h/fc05.deviantart.net/fs70/f/2013/005/8/0/23_by_paul375-d5qkgfc.jpg)
Day 11 (New Year Day)
Had to add in a strip to make the hands a bit wider
![[Paul's Sketchbook] Photoblog of Awesome - Page 2 24_by_paul375-d5qkgfi](https://2img.net/h/fc02.deviantart.net/fs71/f/2013/005/c/6/24_by_paul375-d5qkgfi.jpg)
Added a ‘cuff’, now they are finished.
![[Paul's Sketchbook] Photoblog of Awesome - Page 2 25_by_paul375-d5qkgfm](https://2img.net/h/fc04.deviantart.net/fs70/f/2013/005/7/9/25_by_paul375-d5qkgfm.jpg)
There is Velcro to open this to get hand in and out. When closed it creates a fold in the fabric to tighten it.
There are a few loose threads that need tying off and or fixing around the thumb on one and the tip of a finger on the other. Otherwise all good.
Now I am working on shoes for Ash cosplay.
There have been complaints about my existing shoe covers not being fat, chunky, puffy and shiny enough, so I have set out to rectify this problem.
Art by the complainant, for reference, showing how it is supposed to look:
![[Paul's Sketchbook] Photoblog of Awesome - Page 2 Blackgold_radenwa_by_paul375-d5ql8xj](https://2img.net/h/fc03.deviantart.net/fs70/f/2013/005/8/2/blackgold_radenwa_by_paul375-d5ql8xj.jpg)
Black Trainer has the same shoes as Ash.
I have come up with some new ideas for my shoe covers. I will try them with Ash shoes.
There will be two layers so that padding can be put in them.
The band around the bottom edge will also be quite thick (To look more like normal shoes.)
I also have some new ideas about the ‘toe cap’ part.
The ‘flap’ with padding in it is sewn between the side parts. A lining is made to go against the shoe underneath.
![[Paul's Sketchbook] Photoblog of Awesome - Page 2 30_by_paul375-d5ql9q3](https://2img.net/h/fc08.deviantart.net/fs71/f/2013/005/4/f/30_by_paul375-d5ql9q3.jpg) ![[Paul's Sketchbook] Photoblog of Awesome - Page 2 31_by_paul375-d5ql9q5](https://2img.net/h/fc02.deviantart.net/fs71/f/2013/005/a/a/31_by_paul375-d5ql9q5.jpg)
First attempt at making the toe shape, fails.
![[Paul's Sketchbook] Photoblog of Awesome - Page 2 32_by_paul375-d5ql9q8](https://2img.net/h/fc06.deviantart.net/fs70/f/2013/005/5/4/32_by_paul375-d5ql9q8.jpg)
Its going to be unpicked and a new one made. Seems the shape needs to be a straight strip not a curve :- )
Day 12
In a car all day so no work done.
Day 13
I removed the toe part of Ash’s shoes, made a new one and installed it. This time it is made from a straight strip so it will create the required curved down shape.
![[Paul's Sketchbook] Photoblog of Awesome - Page 2 33_by_paul375-d5ql9qg](https://2img.net/h/fc02.deviantart.net/fs70/f/2013/005/a/4/33_by_paul375-d5ql9qg.jpg)
Not very good progress for one day. But I did try out some old Beta VCR’s :- ) http://sta.sh/03scbzltimx so that makes up for it.
Day 14
Working on Ash’s shoes.
Toe parts finished and sides folded under.
Straps made and ready
![[Paul's Sketchbook] Photoblog of Awesome - Page 2 34_by_paul375-d5ql9qj](https://2img.net/h/fc08.deviantart.net/fs70/f/2013/005/2/c/34_by_paul375-d5ql9qj.jpg)
Back finished. Had to inset a strip to make it reach (This always happens despite me cutting longer than the pattern)
![[Paul's Sketchbook] Photoblog of Awesome - Page 2 35_by_paul375-d5qlae0](https://2img.net/h/fc01.deviantart.net/fs70/f/2013/005/f/c/35_by_paul375-d5qlae0.jpg)
Day 15
Straps attached. I decided to use two because I had to make them narrow to fit the buckle things I have.
![[Paul's Sketchbook] Photoblog of Awesome - Page 2 36_by_paul375-d5qlae2](https://2img.net/h/fc08.deviantart.net/fs70/f/2013/005/4/2/36_by_paul375-d5qlae2.jpg)
Lining and padding installed
![[Paul's Sketchbook] Photoblog of Awesome - Page 2 37_by_paul375-d5qlae4](https://2img.net/h/fc07.deviantart.net/fs71/f/2013/005/2/a/37_by_paul375-d5qlae4.jpg)
Velcro around bottom edge installed. I made it as four pieces this time. It makes it easier to attach and remove the cover from the shoe and it uses up less Velcro.
![[Paul's Sketchbook] Photoblog of Awesome - Page 2 38_by_paul375-d5qlae6](https://2img.net/h/fc05.deviantart.net/fs70/f/2013/005/a/e/38_by_paul375-d5qlae6.jpg)
White band for bottom edge made.
![[Paul's Sketchbook] Photoblog of Awesome - Page 2 39_by_paul375-d5qlae9](https://2img.net/h/fc01.deviantart.net/fs71/f/2013/005/d/c/39_by_paul375-d5qlae9.jpg)
Day 16
White band attached. It folds down.
![[Paul's Sketchbook] Photoblog of Awesome - Page 2 40_by_paul375-d5qlaz0](https://2img.net/h/fc08.deviantart.net/fs71/f/2013/005/a/6/40_by_paul375-d5qlaz0.jpg)
Top edge made and attached. Took ages and was not easy to get it aligned right. At one point it was like this:
![[Paul's Sketchbook] Photoblog of Awesome - Page 2 Tumblr_m641gzd97n1qdlh1io1_400_by_paul375-d5qlbqo](https://2img.net/h/fc06.deviantart.net/fs71/f/2013/005/e/c/tumblr_m641gzd97n1qdlh1io1_400_by_paul375-d5qlbqo.gif) Trying to touch it with out getting fingers poked by pins. Trying to touch it with out getting fingers poked by pins.
![[Paul's Sketchbook] Photoblog of Awesome - Page 2 41_by_paul375-d5qlaz6](https://2img.net/h/fc03.deviantart.net/fs70/f/2013/005/2/4/41_by_paul375-d5qlaz6.jpg) ![[Paul's Sketchbook] Photoblog of Awesome - Page 2 Ash_ketchum_bw_by_paul375-d5ler96](https://2img.net/h/fc00.deviantart.net/fs70/f/2012/322/0/6/ash_ketchum_bw_by_paul375-d5ler96.png)
Top of ‘flap’ made and attached.
![[Paul's Sketchbook] Photoblog of Awesome - Page 2 42_by_paul375-d5qlaz8](https://2img.net/h/fc06.deviantart.net/fs71/f/2013/005/9/6/42_by_paul375-d5qlaz8.jpg)
Straps finished off.
Ash shoes are done!
![[Paul's Sketchbook] Photoblog of Awesome - Page 2 Shoefinished_by_paul375-d5qlcji](https://2img.net/h/fc01.deviantart.net/fs70/f/2013/005/9/0/shoefinished_by_paul375-d5qlcji.jpg)
Maybe I need to get some white tape to put around the black shoes sole.
I’ll wait for the hat to arrive before I make ‘completed’ photos. A hat should be on its way. It was difficult to find one that was decent looking and could be shipped to New Zealand. I ended up having to ask an ebay seller to list one for me.
Now to make Lucario Gloves!
~ Holiday Ends ~ :- ( |
|
Paul
Almighty
Number of posts : 395
Age : 38
Transforms into : Pokemon Trainer
Gender : Male
Registration date : 2008-09-07
|
| | |
|
Re: [Paul's Sketchbook] Photoblog of Awesome
By Paul. 27/01/13, 06:35 am
|
| I've been working on Lucaro Gloves. Progress has been slow but they are nearly there. I'll post when they are done. In the mean time!:
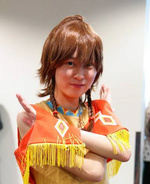
![[Paul's Sketchbook] Photoblog of Awesome - Page 2 Kiba_by_paul375-d5sucxm](https://2img.net/h/fc08.deviantart.net/fs71/f/2013/026/6/9/kiba_by_paul375-d5sucxm.jpg)
Kiba!
Cosplay I brought from 399 Cosplay Store. Mainly because I wanted the Jacket but I might wear this to a convention some time because Kiba is awesome! |
|
Paul
Almighty
Number of posts : 395
Age : 38
Transforms into : Pokemon Trainer
Gender : Male
Registration date : 2008-09-07
|
| | |
|
Re: [Paul's Sketchbook] Photoblog of Awesome
By Paul. 28/01/13, 02:41 pm
|
| Now I am making Lucrio Gloves. (See picture top of this page for reference)
Being back at work has lowered motivation a bit. So it has taken a while to get them done.
Zaji’s gloves I made earlier were practise for this.
They start of the same. There are pads on the finger tips and palm. I had to cut the thumb opening early on for this, which resulted in it being in the wrong place...
![[Paul's Sketchbook] Photoblog of Awesome - Page 2 Glove_01_by_paul375-d5t0csr](https://2img.net/h/fc00.deviantart.net/fs71/f/2013/028/0/a/glove_01_by_paul375-d5t0csr.jpg)
I was thinking about starting over at this point. As I had done several days work already I decided to fix it instead.
![[Paul's Sketchbook] Photoblog of Awesome - Page 2 Glove_02_by_paul375-d5t0csu](https://2img.net/h/fc08.deviantart.net/fs70/f/2013/028/c/4/glove_02_by_paul375-d5t0csu.jpg)
It needed a small semi circular piece sewn in to cover the original thumb hole and then allowed a new one to be created. It was not easy to install as the curves go the wrong way. It is like trying to attach a micro size sleeve shoulder with out being able to pin as it will leave holes in the fabric. Got there eventually.
Fingers sewn together.
![[Paul's Sketchbook] Photoblog of Awesome - Page 2 Glove_03_by_paul375-d5t0csw](https://2img.net/h/fc05.deviantart.net/fs70/f/2013/028/5/c/glove_03_by_paul375-d5t0csw.jpg)
Now the hand part is mostly done I started to make the 'cuff' part. Starting with the puffy back area
![[Paul's Sketchbook] Photoblog of Awesome - Page 2 Glove_04_by_paul375-d5t0ct0](https://2img.net/h/fc07.deviantart.net/fs70/f/2013/028/1/8/glove_04_by_paul375-d5t0ct0.jpg)
and the spikes to go onto the back of the hand. These are made from some silver coloured fabric, cut to about a quarter of a circle and stitched together.
I thought for a long time to come up with a good way of attaching them, the best idea I had was recessed Velcro. It needs to be recessed so the base of the spike sits flush.
I made a disk and a donut from solid card glued them together and attached Velcro. This was inserted in to the bottom of the spikes after they had stuffing forced in.
![[Paul's Sketchbook] Photoblog of Awesome - Page 2 Glove_05_by_paul375-d5t0ct1](https://2img.net/h/fc01.deviantart.net/fs71/f/2013/028/b/8/glove_05_by_paul375-d5t0ct1.jpg)
I gathered the edges of the spike and tied it tight after putting in some glue. This was left over night to dry with an empty film container with weights on it over the spike pressing the rim of the film container on the edge of the spike. That held it down very well while the glue dried.
![[Paul's Sketchbook] Photoblog of Awesome - Page 2 Glove_06_by_paul375-d5t0cta](https://2img.net/h/fc06.deviantart.net/fs71/f/2013/028/e/b/glove_06_by_paul375-d5t0cta.jpg)
Corresponding Velcro was attached to the backs of the gloves
![[Paul's Sketchbook] Photoblog of Awesome - Page 2 Glove_07_by_paul375-d5t0ctc](https://2img.net/h/fc04.deviantart.net/fs71/f/2013/028/0/e/glove_07_by_paul375-d5t0ctc.jpg)
The remaining parts of the cuff were attached in a battle that raged for over a week. The sewing machine does not fit in tight places very easily.
There is still a bit of a mess where the hand and the cuff parts meet, but it will do.
The inside of the cuff was attached.
![[Paul's Sketchbook] Photoblog of Awesome - Page 2 Glove_08_by_paul375-d5t0ctd](https://2img.net/h/fc06.deviantart.net/fs71/f/2013/028/d/2/glove_08_by_paul375-d5t0ctd.jpg)
The cuff is folded over the hand part and padding inserted
![[Paul's Sketchbook] Photoblog of Awesome - Page 2 Glove_09_by_paul375-d5t0ctf](https://2img.net/h/fc05.deviantart.net/fs70/f/2013/028/d/4/glove_09_by_paul375-d5t0ctf.jpg)
And the inside cuff fabric is sewn to the edge of the hand part.
Finally the finger spikes are screwed onto screws from the inside through holes I punched earlier on. (When I could get access :- )
![[Paul's Sketchbook] Photoblog of Awesome - Page 2 Glove_10_by_paul375-d5t0cth](https://2img.net/h/fc06.deviantart.net/fs71/f/2013/028/e/c/glove_10_by_paul375-d5t0cth.jpg)
![[Paul's Sketchbook] Photoblog of Awesome - Page 2 Glove_11_by_paul375-d5t0ctl](https://2img.net/h/fc02.deviantart.net/fs71/f/2013/028/a/d/glove_11_by_paul375-d5t0ctl.jpg)
![[Paul's Sketchbook] Photoblog of Awesome - Page 2 Glove_12_by_paul375-d5t0ctn](https://2img.net/h/fc02.deviantart.net/fs71/f/2013/028/8/3/glove_12_by_paul375-d5t0ctn.jpg)
Next I am going to try and make a start on the shoes, ears and Tail. Doing many at once might help keep up the motivation levels. ![[Paul's Sketchbook] Photoblog of Awesome - Page 2 755823](/users/2913/77/88/04/smiles/755823.png) |
|
Paul
Almighty
Number of posts : 395
Age : 38
Transforms into : Pokemon Trainer
Gender : Male
Registration date : 2008-09-07
|
| | |
|
Re: [Paul's Sketchbook] Photoblog of Awesome
By Paul. 06/02/13, 02:28 pm
|
| Ash Coplay is done!
![[Paul's Sketchbook] Photoblog of Awesome - Page 2 Ash_cnz_by_paul375-d5u00zr](https://2img.net/h/fc04.deviantart.net/fs70/f/2013/037/2/7/ash_cnz_by_paul375-d5u00zr.jpg) ![[Paul's Sketchbook] Photoblog of Awesome - Page 2 Ashneko_cnz_by_paul375-d5u015m](https://2img.net/h/fc04.deviantart.net/fs70/f/2013/037/5/c/ashneko_cnz_by_paul375-d5u015m.jpg)
Well it was done a while ago when the hat arrived. But I was only recently able to get some good photos of it.
Did you know, Ash is a Neko? You can't normally tell because his hat covers his ears.
More can be seen here: http://fav.me/d5tsk36
Ears for Ken have also arrived.
![[Paul's Sketchbook] Photoblog of Awesome - Page 2 Ken_cnz_by_paul375-d5u00vp](https://2img.net/h/fc08.deviantart.net/fs71/f/2013/037/6/1/ken_cnz_by_paul375-d5u00vp.jpg)
I'll put some photos on Deviant in the coming week along with some better photos of Kiba too. (Several were taken today :- ) I put some hair spray on Ken's wig to try and reduce the fluff. It looked ok at first but probably needs more, it still looks fluffy on top in the photos.
I started to make Lucario's Shoes. (See picture top of this page for reference)
The base shape with lining attached and the toe part attached.
![[Paul's Sketchbook] Photoblog of Awesome - Page 2 Lucarioshoe1_by_paul375-d5u01eg](https://2img.net/h/fc01.deviantart.net/fs70/f/2013/037/6/8/lucarioshoe1_by_paul375-d5u01eg.jpg)
I made a puffy flap to go down the centre and attached it.
![[Paul's Sketchbook] Photoblog of Awesome - Page 2 Lucarioshoe2_by_paul375-d5u02e0](https://2img.net/h/fc00.deviantart.net/fs71/f/2013/037/d/0/lucarioshoe2_by_paul375-d5u02e0.jpg)
It is being held together with tape while I work out the sizing and positions of things. Pinning would leave holes in the fabric.
Now I am designing and making the details for the back of the shoes. |
|
Paul
Almighty
Number of posts : 395
Age : 38
Transforms into : Pokemon Trainer
Gender : Male
Registration date : 2008-09-07
|
| | |
|
Re: [Paul's Sketchbook] Photoblog of Awesome
By chiken_skratch. 06/02/13, 11:35 pm
|
| | I always love looking at how you make your shoes, you're so bloody talented!!! Keep up the good work, it serves as a good reminder to stop procratinating seeing your progress all the trime! X3 |
| 
chiken_skratch
EPICLY EPIC
Number of posts : 606
Age : 31
Location : Tauranga
Transforms into : somebody more useful
Gender : Female
Registration date : 2009-09-14
|
| | |
|
Re: [Paul's Sketchbook] Photoblog of Awesome
By Paul. 07/02/13, 05:02 pm
|
| ^ Thanks.
Though I feel I am procrastinating / not getting on with it enough... Too many distracting things (Yes: dA, FB, Youtube ![[Paul's Sketchbook] Photoblog of Awesome - Page 2 2982](/users/2913/77/88/04/smiles/2982.gif) ) ) |
|
Paul
Almighty
Number of posts : 395
Age : 38
Transforms into : Pokemon Trainer
Gender : Male
Registration date : 2008-09-07
|
| | |
|
Re: [Paul's Sketchbook] Photoblog of Awesome
By Paul. 11/02/13, 01:25 pm
|
| Lucario Shoes!
Finally I had some motivation to work almost continuously for most of a day.
I made the back parts
![[Paul's Sketchbook] Photoblog of Awesome - Page 2 Shoe_22_by_paul375-d5uk7t1](https://2img.net/h/fc09.deviantart.net/fs70/f/2013/042/d/3/shoe_22_by_paul375-d5uk7t1.jpg)
This is a piece of fabric glued onto felt. I thought it would be easier to glue the edges over than try to sew them. Also it means when I sew it on the to the shoe there won’t already be a line of stitching there and I will be able to concentrate on the positioning instead of the edge folding over.
It was taped down then left while the glue dried with heavy object on it.
The part for the top back is puffy part with strips around it.
![[Paul's Sketchbook] Photoblog of Awesome - Page 2 Shoe_23_by_paul375-d5uk7t3](https://2img.net/h/fc09.deviantart.net/fs71/f/2013/042/2/b/shoe_23_by_paul375-d5uk7t3.jpg)
I made reasonable progress on the front cover thing for the shoes. (See the reference at the top of this page) It has a special shape because it has to be curved and bend around the ankle position to go along the top of the foot.
The bottom puffy part is made from two parts carefully sewn together to give it a curve shape.
![[Paul's Sketchbook] Photoblog of Awesome - Page 2 Shoe_27_by_paul375-d5uk7ti](https://2img.net/h/fc09.deviantart.net/fs71/f/2013/042/a/0/shoe_27_by_paul375-d5uk7ti.jpg)
I made the badge thing to go at the top. This is a bit of fabric covering felt. I put tear away stabiliser over it to allow the sewing machine foot to slide on it. This also allowed me to draw on the design for stitching.
![[Paul's Sketchbook] Photoblog of Awesome - Page 2 Shoe_24_by_paul375-d5uk7t6](https://2img.net/h/fc05.deviantart.net/fs71/f/2013/042/0/d/shoe_24_by_paul375-d5uk7t6.jpg)
After stitching
![[Paul's Sketchbook] Photoblog of Awesome - Page 2 Shoe_25_by_paul375-d5uk7tb](https://2img.net/h/fc02.deviantart.net/fs70/f/2013/042/b/b/shoe_25_by_paul375-d5uk7tb.jpg)
After removing the stabaliser
![[Paul's Sketchbook] Photoblog of Awesome - Page 2 Shoe_26_by_paul375-d5uk7tf](https://2img.net/h/fc08.deviantart.net/fs70/f/2013/042/0/3/shoe_26_by_paul375-d5uk7tf.jpg)
The part that boarders the puffy bit was suppose to be a bit curved, but I forgot about that when joining the puffy parts together with strips
![[Paul's Sketchbook] Photoblog of Awesome - Page 2 Shoe_28_by_paul375-d5uk7tk](https://2img.net/h/fc08.deviantart.net/fs70/f/2013/042/6/5/shoe_28_by_paul375-d5uk7tk.jpg)
Stitching on badge.
![[Paul's Sketchbook] Photoblog of Awesome - Page 2 Shoe_29_by_paul375-d5uk7tn](https://2img.net/h/fc06.deviantart.net/fs70/f/2013/042/2/2/shoe_29_by_paul375-d5uk7tn.jpg)
I used paper this time to help it slide on the sewing machine. It worked ok too. It might have been a bit more tricky to tear away because it tears easier it can leave little bits.
![[Paul's Sketchbook] Photoblog of Awesome - Page 2 Shoe_30_by_paul375-d5uk7tq](https://2img.net/h/fc09.deviantart.net/fs70/f/2013/042/f/6/shoe_30_by_paul375-d5uk7tq.jpg)
Now I have to make the back part for this. When this is attached one of the straps will have to be sewn in. |
|
Paul
Almighty
Number of posts : 395
Age : 38
Transforms into : Pokemon Trainer
Gender : Male
Registration date : 2008-09-07
|
| | |
|
Re: [Paul's Sketchbook] Photoblog of Awesome
By Paul. 28/02/13, 02:35 pm
|
| Lucario Shoes are now close to completion. They have taken a lot longer than I wanted. Time is running out now.
Front flap thing was finished and attached. Back parts and straps were attached.
![[Paul's Sketchbook] Photoblog of Awesome - Page 2 Shoe_40_by_paul375-d5wh0am](https://2img.net/h/fc09.deviantart.net/fs71/f/2013/059/9/3/shoe_40_by_paul375-d5wh0am.jpg)
Padding installed by hot gluing it in.
Padding in the toe area:
![[Paul's Sketchbook] Photoblog of Awesome - Page 2 Shoe_41_by_paul375-d5wh0ao](https://2img.net/h/fc08.deviantart.net/fs70/f/2013/059/e/8/shoe_41_by_paul375-d5wh0ao.jpg)
Then the lining was glued down.
Top edge finished
![[Paul's Sketchbook] Photoblog of Awesome - Page 2 Shoe_50_by_paul375-d5wh0kt](https://2img.net/h/fc02.deviantart.net/fs71/f/2013/059/3/5/shoe_50_by_paul375-d5wh0kt.jpg)
It is made from a strip that is sewn on the outside then folded over and glued down on the inside. I did it like those because I did not want stitching showing and I did not want to squash the padding by sewing it.
Bottom edge made and attached. Velcro installed
![[Paul's Sketchbook] Photoblog of Awesome - Page 2 Shoe_42_by_paul375-d5wh0ap](https://2img.net/h/fc05.deviantart.net/fs71/f/2013/059/1/f/shoe_42_by_paul375-d5wh0ap.jpg)
Strap ends sorted out and cut to length. Now the shoes are done apart from the remaining silver details.
I also need to finish off the remaining spikes.
![[Paul's Sketchbook] Photoblog of Awesome - Page 2 Shoe_43_by_paul375-d5wh0ar](https://2img.net/h/fc00.deviantart.net/fs70/f/2013/059/7/d/shoe_43_by_paul375-d5wh0ar.jpg)
![[Paul's Sketchbook] Photoblog of Awesome - Page 2 Shoe_44_by_paul375-d5wh0at](https://2img.net/h/fc04.deviantart.net/fs70/f/2013/059/d/e/shoe_44_by_paul375-d5wh0at.jpg)
The spikes shown above are from the gloves.
Spikes are ready for the top part to be attached to the base.
![[Paul's Sketchbook] Photoblog of Awesome - Page 2 Shoe49_by_paul375-d5wh0ib](https://2img.net/h/fc09.deviantart.net/fs71/f/2013/059/9/4/shoe49_by_paul375-d5wh0ib.jpg)
I also made the belts
They are normal strap with metal studs (that I got on ebay) attached along them.
![[Paul's Sketchbook] Photoblog of Awesome - Page 2 Shoe_46_by_paul375-d5wh0b0](https://2img.net/h/fc06.deviantart.net/fs71/f/2013/059/a/5/shoe_46_by_paul375-d5wh0b0.jpg)
There are two separate belts with studs and a third (though trouser belt loops) which is plain.
And I have attached clips to the chain I brought a while back. I used black cable ties.
![[Paul's Sketchbook] Photoblog of Awesome - Page 2 Shoe_47_by_paul375-d5wh0b1](https://2img.net/h/fc01.deviantart.net/fs70/f/2013/059/e/a/shoe_47_by_paul375-d5wh0b1.jpg)
![[Paul's Sketchbook] Photoblog of Awesome - Page 2 Shoe_48_by_paul375-d5wh0b3](https://2img.net/h/fc00.deviantart.net/fs71/f/2013/059/6/6/shoe_48_by_paul375-d5wh0b3.jpg)
Plan is to finish shoes then make tail and ears and start jacket. |
|
Paul
Almighty
Number of posts : 395
Age : 38
Transforms into : Pokemon Trainer
Gender : Male
Registration date : 2008-09-07
|
| | |
|
Re: [Paul's Sketchbook] Photoblog of Awesome
By Paul. 04/03/13, 02:41 pm
|
| I didn't do anymore work on the shoes but while motivation was striking I was able to make the ears and tail.
Prototypes were required to get the tricky shapes right. Then actual versions were made.
Ear Prototype:
![[Paul's Sketchbook] Photoblog of Awesome - Page 2 100_by_paul375-d5wx842](https://2img.net/h/fc00.deviantart.net/fs70/f/2013/063/3/6/100_by_paul375-d5wx842.jpg)
Final Version:
![[Paul's Sketchbook] Photoblog of Awesome - Page 2 101_by_paul375-d5wx845](https://2img.net/h/fc09.deviantart.net/fs71/f/2013/063/c/f/101_by_paul375-d5wx845.jpg)
Ready to be attached to wig.
Despite the gijinka reference image, I decided to make a more realistic tail.
![[Paul's Sketchbook] Photoblog of Awesome - Page 2 102_by_paul375-d5wx84b](https://2img.net/h/fc08.deviantart.net/fs70/f/2013/063/6/b/102_by_paul375-d5wx84b.jpg)
Drawing tail, sizing based on my tail for Ken which is a good size.
![[Paul's Sketchbook] Photoblog of Awesome - Page 2 103_by_paul375-d5wx84e](https://2img.net/h/fc07.deviantart.net/fs70/f/2013/063/f/7/103_by_paul375-d5wx84e.jpg)
After two prototypes I arrived at the final design. Some parts had to be made a bit fatter than I originally drew.
The base still needs to be stitched up.
I managed to get a lot of fur all over the place.
I am going to try and hang the tip of the tail from the jacket (somehow, with fine fishing line stuff) so it can stick upwards rather than hang down lifeless.
I made a start on the jacket.
First a pattern needed to be created. It is based on the Pokemon Ranger Lunick Jacket I made. Which was based on Naruto Jacket which I made based on a Jacket I own.
![[Paul's Sketchbook] Photoblog of Awesome - Page 2 104_by_paul375-d5wx84j](https://2img.net/h/fc03.deviantart.net/fs70/f/2013/063/4/4/104_by_paul375-d5wx84j.jpg)
The sleeves have black parts on the shoulders and elbows. I decided to make these part of it instead of patches sewn on, because sewing on patches is always tricky to get then in the right place and not wrinkled up. Especially with this fabric.
![[Paul's Sketchbook] Photoblog of Awesome - Page 2 105_by_paul375-d5wx84m](https://2img.net/h/fc06.deviantart.net/fs71/f/2013/063/6/c/105_by_paul375-d5wx84m.jpg)
Then the front and back parts were made.
![[Paul's Sketchbook] Photoblog of Awesome - Page 2 106_by_paul375-d5wx84o](https://2img.net/h/fc01.deviantart.net/fs70/f/2013/063/8/d/106_by_paul375-d5wx84o.jpg)
Lining made
![[Paul's Sketchbook] Photoblog of Awesome - Page 2 109_by_paul375-d5wx8p9](https://2img.net/h/fc05.deviantart.net/fs70/f/2013/063/7/a/109_by_paul375-d5wx8p9.jpg)
I decided to make two of the badges for the jacket. Based on time restrictions and what materials I have available.
![[Paul's Sketchbook] Photoblog of Awesome - Page 2 107_by_paul375-d5wx84r](https://2img.net/h/fc04.deviantart.net/fs71/f/2013/063/7/5/107_by_paul375-d5wx84r.jpg)
I also finished the spikes for the shoes and the chest area.
![[Paul's Sketchbook] Photoblog of Awesome - Page 2 108_by_paul375-d5wx84s](https://2img.net/h/fc00.deviantart.net/fs70/f/2013/063/5/9/108_by_paul375-d5wx84s.jpg)
The base part needed to be glued on. (Shown earlier)
I used film containers over the spikes with weights on top to hold the outer edge of the spike base while the glue dries. I put a 'drawstring' around the bottom edge of the fabric so it can be pulled tight over the base (The only way I could see to get the fabric in the right place for gluing)
Next I need to finish the badges, make the black things for the shoulders and the straps around the back then I can start putting the Jacket together. |
|
Paul
Almighty
Number of posts : 395
Age : 38
Transforms into : Pokemon Trainer
Gender : Male
Registration date : 2008-09-07
|
| | |
|
Re: [Paul's Sketchbook] Photoblog of Awesome
By chiken_skratch. 05/03/13, 04:13 am
|
| | Really good to see all your progress, and yur patterning abilities freakn amaze me. And those boots!!! They look really really good!! Can't wait to see everything when it is finished |
|
chiken_skratch
EPICLY EPIC
Number of posts : 606
Age : 31
Location : Tauranga
Transforms into : somebody more useful
Gender : Female
Registration date : 2009-09-14
|
| | |
|
Re: [Paul's Sketchbook] Photoblog of Awesome
By Paul. 10/03/13, 02:37 pm
|
| ^ Thank you :- )
Page 4!
http://fav.me/d5lkqkb
I've been making the jacket for Lucario Gijinka. I did not get as much done during the week as I was hoping to.
Making the round badge for the Jacket failed. A second attempt also failed. So I will just use the red one. Main parts of the Jacket have been assembled.
The black shoulder things are made with some felt in them.
![[Paul's Sketchbook] Photoblog of Awesome - Page 2 110_by_paul375-d5xjwmi](https://2img.net/h/fc05.deviantart.net/fs71/f/2013/069/5/9/110_by_paul375-d5xjwmi.jpg)
Sewn on after the straps are sewn at the top of the shoulders.
![[Paul's Sketchbook] Photoblog of Awesome - Page 2 111_by_paul375-d5xjwmm](https://2img.net/h/fc06.deviantart.net/fs71/f/2013/069/a/2/111_by_paul375-d5xjwmm.jpg)
Badge attached along with some Velcro for the other ends of the straps.
Lining inserted and the front edge is prepared for the zip. The lining and the outer fabric are folded towards each other. I sewed it like this first without the zip about 15mm in, then inserted the zip into the gap that was left and sew again. Because this fabric will get permanent holes from pins. I did it this way to avoid having to hold the fabric and zip in the right place all at the same time.
![[Paul's Sketchbook] Photoblog of Awesome - Page 2 112_by_paul375-d5xjwmo](https://2img.net/h/fc03.deviantart.net/fs70/f/2013/069/8/8/112_by_paul375-d5xjwmo.jpg)
This makes it tidy inside and out.
Zip installed
![[Paul's Sketchbook] Photoblog of Awesome - Page 2 113_by_paul375-d5xjwms](https://2img.net/h/fc05.deviantart.net/fs70/f/2013/069/0/5/113_by_paul375-d5xjwms.jpg)
In all cases top stitching was required I used paper over the fabric. This seems to eliminate all movement of the top fabric relative to the bottom and makes sewing much easier.
Now the bottom band is attached. This has a strip of felt in it.
![[Paul's Sketchbook] Photoblog of Awesome - Page 2 114_by_paul375-d5xjwmt](https://2img.net/h/fc07.deviantart.net/fs70/f/2013/069/2/0/114_by_paul375-d5xjwmt.jpg)
Tape is used to hold it in place before sewing (My clips can't reach).
![[Paul's Sketchbook] Photoblog of Awesome - Page 2 115_by_paul375-d5xjwmu](https://2img.net/h/fc01.deviantart.net/fs70/f/2013/069/8/8/115_by_paul375-d5xjwmu.jpg)
![[Paul's Sketchbook] Photoblog of Awesome - Page 2 116_by_paul375-d5xjwmx](https://2img.net/h/fc03.deviantart.net/fs71/f/2013/069/1/e/116_by_paul375-d5xjwmx.jpg)
Now I have to make and attach the collar and finish off the sleeve ends.
Parts are ready to make collar.
![[Paul's Sketchbook] Photoblog of Awesome - Page 2 117_by_paul375-d5xjx6z](https://2img.net/h/fc01.deviantart.net/fs71/f/2013/069/c/6/117_by_paul375-d5xjx6z.jpg)
I also adjusted the pants. It was suggest the upper legs were too wide. I have taken them in a bit. Better now.
The studded belts needed to be a bit longer than I first thought so I have added some more studs to the end where I made them longer.
I made the sash that holds the chest spike. This does not look like it will work because the weight of the spike causes it to hang downwards.
![[Paul's Sketchbook] Photoblog of Awesome - Page 2 118_by_paul375-d5xjx71](https://2img.net/h/fc05.deviantart.net/fs70/f/2013/069/4/b/118_by_paul375-d5xjx71.jpg)
I am going to try to pin it to the T-Shirt (yellow) and see if that is enough to hold the spike.
It might need something to stabilise it on the inside of T-Shirt. |
|
Paul
Almighty
Number of posts : 395
Age : 38
Transforms into : Pokemon Trainer
Gender : Male
Registration date : 2008-09-07
|
| | |
|
Re: [Paul's Sketchbook] Photoblog of Awesome
By Paul. 18/03/13, 03:01 pm
|
| Working on Lucario Jacket.
I attached the collar. Fur got everywhere and was found as far away as my chair at work...
When faced with this:
![[Paul's Sketchbook] Photoblog of Awesome - Page 2 201_by_paul375-d5yfrz2](https://2img.net/h/fc02.deviantart.net/fs70/f/2013/077/2/d/201_by_paul375-d5yfrz2.jpg)
I felt like giving up. But after a few hours I was able to get it all sorted out and stitched into place.
There is felt in there to help it keep its shape.
At first I forgot the covers for the tops of the zip so had to unpick one side to insert it.
Showing the outside and inside of one end of the collar:
![[Paul's Sketchbook] Photoblog of Awesome - Page 2 202_by_paul375-d5yfrz6](https://2img.net/h/fc03.deviantart.net/fs71/f/2013/077/5/8/202_by_paul375-d5yfrz6.jpg)
In use, collar will be folded down.
Now Jacket is finished.
![[Paul's Sketchbook] Photoblog of Awesome - Page 2 203_by_paul375-d5yfrz7](https://2img.net/h/fc02.deviantart.net/fs71/f/2013/077/9/5/203_by_paul375-d5yfrz7.jpg)
Ears have been attached to wig. I also made and attached the headband. I turned the hair at the front around so that it sticks up over the band.
![[Paul's Sketchbook] Photoblog of Awesome - Page 2 211_by_paul375-d5yfrzm](https://2img.net/h/fc09.deviantart.net/fs70/f/2013/077/2/7/211_by_paul375-d5yfrzm.jpg)
Now I've got to cut the wig a bit more.
Also need to do something about the mess at the top front.
I made the strap thing that goes around the left upper arm.
![[Paul's Sketchbook] Photoblog of Awesome - Page 2 204_by_paul375-d5yfrz9](https://2img.net/h/fc00.deviantart.net/fs70/f/2013/077/0/3/204_by_paul375-d5yfrz9.jpg)
I put some of the vinyl fabric on the inside of the strap so that it would stick on to the sleeve and stay in place with out needing to be too tight.
![[Paul's Sketchbook] Photoblog of Awesome - Page 2 205_by_paul375-d5yfrzb](https://2img.net/h/fc00.deviantart.net/fs71/f/2013/077/f/b/205_by_paul375-d5yfrzb.jpg)
The last details were made and attached to the shoes. This proved to be much more difficult than I was expecting.
![[Paul's Sketchbook] Photoblog of Awesome - Page 2 206_by_paul375-d5yfrzd](https://2img.net/h/fc05.deviantart.net/fs70/f/2013/077/9/8/206_by_paul375-d5yfrzd.jpg)
Making these small rectangular parts was a bit tricky. The edges did not want to stay folded stright.
![[Paul's Sketchbook] Photoblog of Awesome - Page 2 207_by_paul375-d5yfrzg](https://2img.net/h/fc09.deviantart.net/fs70/f/2013/077/e/7/207_by_paul375-d5yfrzg.jpg)
In the end with tape and paper on the top and bottom I was able to do it.
Sides of the heel:
![[Paul's Sketchbook] Photoblog of Awesome - Page 2 209_by_paul375-d5yfrzh](https://2img.net/h/fc05.deviantart.net/fs71/f/2013/077/c/1/209_by_paul375-d5yfrzh.jpg)
on the front edge:
![[Paul's Sketchbook] Photoblog of Awesome - Page 2 210_by_paul375-d5yfrzj](https://2img.net/h/fc09.deviantart.net/fs71/f/2013/077/e/4/210_by_paul375-d5yfrzj.jpg)
The shoes are now fully complete.
Lucario will be finished very soon. |
|
Paul
Almighty
Number of posts : 395
Age : 38
Transforms into : Pokemon Trainer
Gender : Male
Registration date : 2008-09-07
|
| | |
|
Re: [Paul's Sketchbook] Photoblog of Awesome
By Paul. 23/03/13, 03:31 pm
|
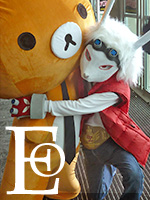
| After a few last tidy ups Lucario Gijinka is now complete.
I had to put some wire in the tail to stop it sagging in the middle when the tip of the tail is hung from the jacket collar.
I also glued my fang teeth in (They are removable).
Today Slinky took a few nice photos for me :- )
![[Paul's Sketchbook] Photoblog of Awesome - Page 2 Cnz_lucario_by_paul375-d5yyg5f](https://2img.net/h/fc02.deviantart.net/fs71/f/2013/082/e/e/cnz_lucario_by_paul375-d5yyg5f.jpg)
More here: http://fav.me/d5yy81m
Today I found some nice characters to add on to my long 'to be cosplayed' list.
![[Paul's Sketchbook] Photoblog of Awesome - Page 2 Untitled_by_paul375-d5yydra](https://2img.net/h/fc09.deviantart.net/fs70/f/2013/082/e/6/untitled_by_paul375-d5yydra.png) ![[Paul's Sketchbook] Photoblog of Awesome - Page 2 Untitled_by_paul375-d5yydr7](https://2img.net/h/fc04.deviantart.net/fs70/f/2013/082/f/3/untitled_by_paul375-d5yydr7.png)
They are from Shinra Bansho, Trading cards. See here for info: http://shinrabanshochocolate.wordpress.com/about/
Now I've got to get back to working on Zaji. |
|
Paul
Almighty
Number of posts : 395
Age : 38
Transforms into : Pokemon Trainer
Gender : Male
Registration date : 2008-09-07
|
| | |
|
Re: [Paul's Sketchbook] Photoblog of Awesome
By chiken_skratch. 24/03/13, 04:30 am
|
| | Wow that came out amazingly awesome. Like seriously, you are too good. Love how the tail is held up by clear thread, when you walk or turn a corner, does the tail move from side to side as well?? And I would imagine that this would be a rather hot cosplay to wear on a sunny day, lol. |
|
chiken_skratch
EPICLY EPIC
Number of posts : 606
Age : 31
Location : Tauranga
Transforms into : somebody more useful
Gender : Female
Registration date : 2009-09-14
|
| | |
|
Re: [Paul's Sketchbook] Photoblog of Awesome
By Paul. 24/03/13, 06:23 am
|
| ^ Thanks
The tail moves around as it pleases. It tends to want to stay fully over on either side.
(I have not got any clear thread yet, so I've used blue for the time being. Which might snap easily? I will upgrade that.)
Wearing it in the shade is ok, in the sun not recommended for long times. Because the jacket is open, it's not as bad as it could be. I guess these theories will be tested at AX, which is in summer time.
I don't think anyone ever said comfort was a priority with cosplay.
-----------
CNZ Achievement Unlocked!
![[Paul's Sketchbook] Photoblog of Awesome - Page 2 Cnz_acheivement_unlocked_by_paul375-d5yyiyg](https://2img.net/h/fc04.deviantart.net/fs70/f/2013/082/2/f/cnz_acheivement_unlocked_by_paul375-d5yyiyg.png)
^ ~ pi posts!
Zaji Shoes!
![[Paul's Sketchbook] Photoblog of Awesome - Page 2 Cnz_zajishoes_by_paul375-d5z1ble](https://2img.net/h/fc08.deviantart.net/fs70/f/2013/082/1/a/cnz_zajishoes_by_paul375-d5z1ble.jpg)
I actually started these last week. Originally I had planned to finish them yesterday, didn't happen. Today? Maybe.
Base shape
![[Paul's Sketchbook] Photoblog of Awesome - Page 2 Zaji_shoe1_by_paul375-d5z1gdf](https://2img.net/h/fc08.deviantart.net/fs70/f/2013/082/f/2/zaji_shoe1_by_paul375-d5z1gdf.jpg)
Toe part made
![[Paul's Sketchbook] Photoblog of Awesome - Page 2 Zaji_shoe2_by_paul375-d5z1gdp](https://2img.net/h/fc04.deviantart.net/fs71/f/2013/082/1/b/zaji_shoe2_by_paul375-d5z1gdp.jpg)
I glued felt inside the toe part. It has made it keep its shape really well.
![[Paul's Sketchbook] Photoblog of Awesome - Page 2 Zaji_shoe3_by_paul375-d5z1gdv](https://2img.net/h/fc09.deviantart.net/fs71/f/2013/082/f/d/zaji_shoe3_by_paul375-d5z1gdv.jpg)
Upper part attached. Black bottom edge attached.
(It looked more black in another reference image) |
|
Paul
Almighty
Number of posts : 395
Age : 38
Transforms into : Pokemon Trainer
Gender : Male
Registration date : 2008-09-07
|
| | |
|
Re: [Paul's Sketchbook] Photoblog of Awesome
By Rolly. 24/03/13, 01:36 pm
|
| | I think the artist for that Rukario gijinka will be very, very pleased!!! :> |
|
Rolly
forum prisoner.
Number of posts : 2918
Age : 33
Location : Auckland!
Transforms into : a stylish shoe for the blind earthbender
Gender : Female
Registration date : 2008-03-24
|
| | |
|
Re: [Paul's Sketchbook] Photoblog of Awesome
By Hannah. 25/03/13, 11:13 am
|
| i hope you send a pic through to them of the final product, it looks AMAZING!
|
| 
Hannah
EVEN MORE EPICLY EPIC
Number of posts : 798
Age : 32
Location : Wellington
Transforms into : a shark yo
Gender : Male
Registration date : 2009-02-14
|
| | |
|
Re: [Paul's Sketchbook] Photoblog of Awesome
By Sponsored content.
|
| |
|
Sponsored content
|
| | |
|
| [Paul's Sketchbook] Photoblog of Awesome | |
|
