Shield Tutorial
 By Cookie Monster. 02/06/10, 02:22 am By Cookie Monster. 02/06/10, 02:22 am
|
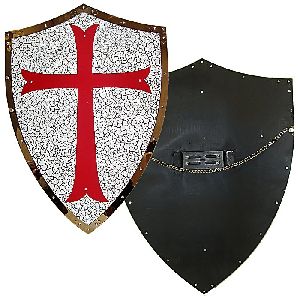
| Before I begin, this is a tutorial on Kite and Heater Shelds. Here's a few examples:
To make a symmetrical kite shield is quite simple and doesn’t require any complicated mathmatics. Best of all, even though it might seem hard to believe at first, it only uses straight lines.
This method will produce a perfect shield every time, and will also leave you a clean surface on the face of your shield.
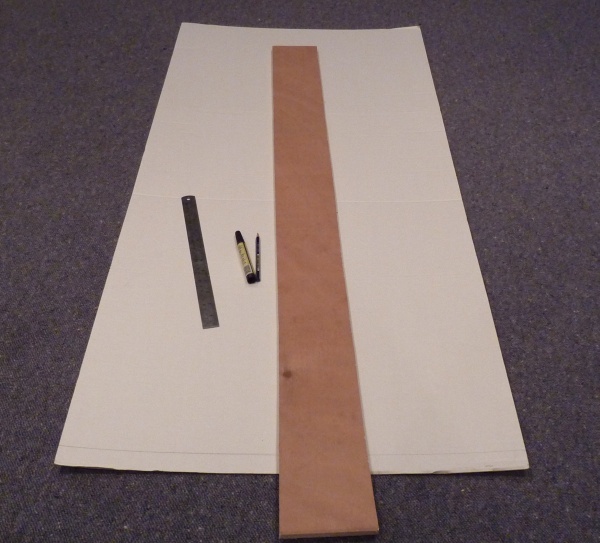
All you need is:
A long ruler which measures in centimetres and inches (or in my case a small ruler and a straight piece of wood)
Wood or Cardboard as the shield material
Felt Pen
Start off by determining how high you want you shield to be, and if you want it “square” or “rectangle”. For this tutorial I have made a “square” shield, 30 inches high.
Next on your shield material (card for this example, so cardboard henceforth) measure and draw out your square, leave 1 inch between the bottom of the card and the bottom square.
Measure the Top and Bottom of the square to 60 cm.
Measure the 2 sides of the square to 30 inches.
If the shield was “rectangle”, measure the top and bottom of the rectangle to only 30 cm.
A general guide to remember would be:
Square: 2cm = 1 inch
Rectangle: 1 cm = 1 inch
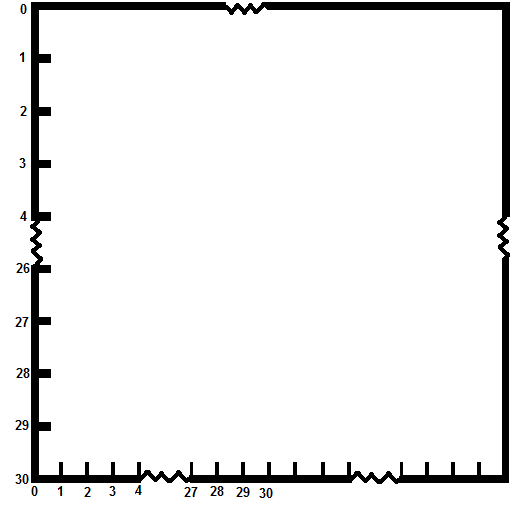
At the bottom of the square, measure from the left of the square into the middle, 30cm.
Mark of 1 cm intervals and number them starting at 0 for the very edge of the square to 30 at the middle.
On left side of the square start at the top and mark of 1 inch intervals and number them starting at 0 for the very top of the square to 30 at the bottom
E.g.:
If making a “rectangle” shield, measure the left side of the rectangle the same as above; However for the bottom measure to the middle, 15cm, and mark off ½ cm
intervals starting at 0 for the very edge and ending at 30 in the middle.
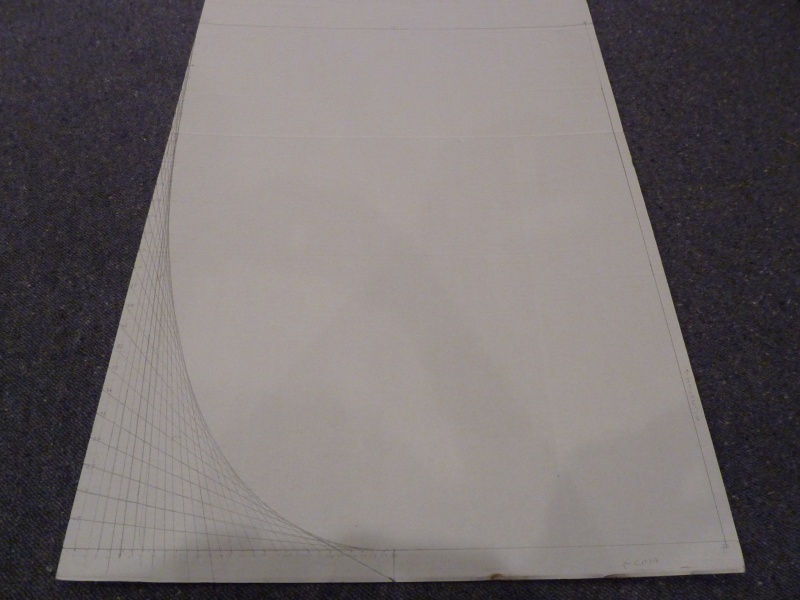
Now for time for some work. Rule a line from 1 inch to 1 cm. Rule another line from 2 inches to 2 cm; 3 to 3, 4 to 4 etc all the way up to 29.
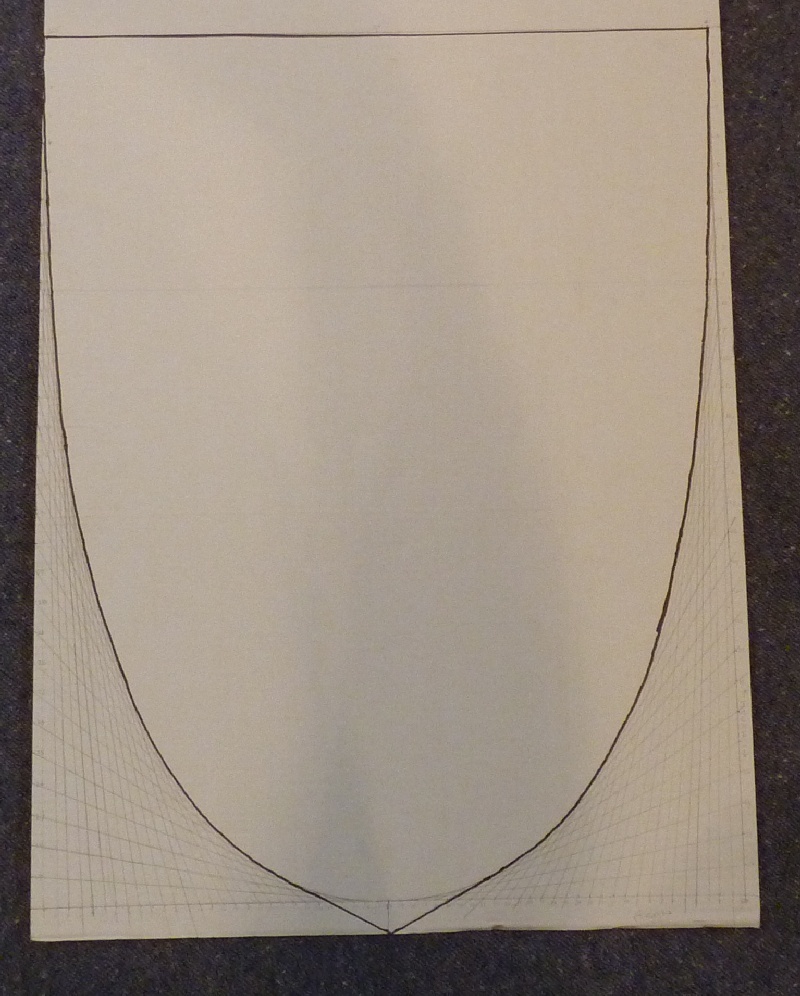
You should end up with something like this:
On the right side of the square, mark off 1 inch intervals from top to bottom like previously.
At the bottom of the square, start from the middle, mark of 1cm intervals from 30 all the way down to 0, at the very end of the square.
E.g.:
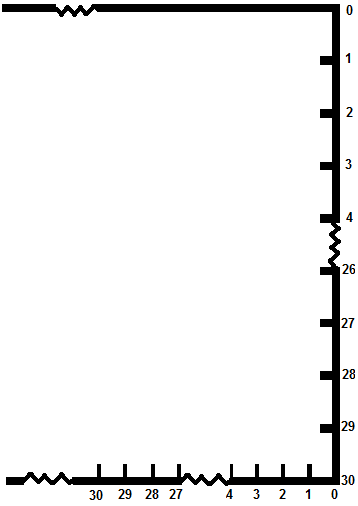
Repeat the ruling from 1 inch to 1cm to 29 inches to 29cm as before.
You can leave the shield with a rounded bottom here, or taper a point to the bottom.
Tapering a point:
Rule a line straight down from the 30cm mark at the bottom of the cardboard. Angle your ruler from the bottom the this line, so it passes through the 25cm mark on the left.
Rule from the bottom, through the 25cm mark, until it reaches your curve,
Repeat on the other side.
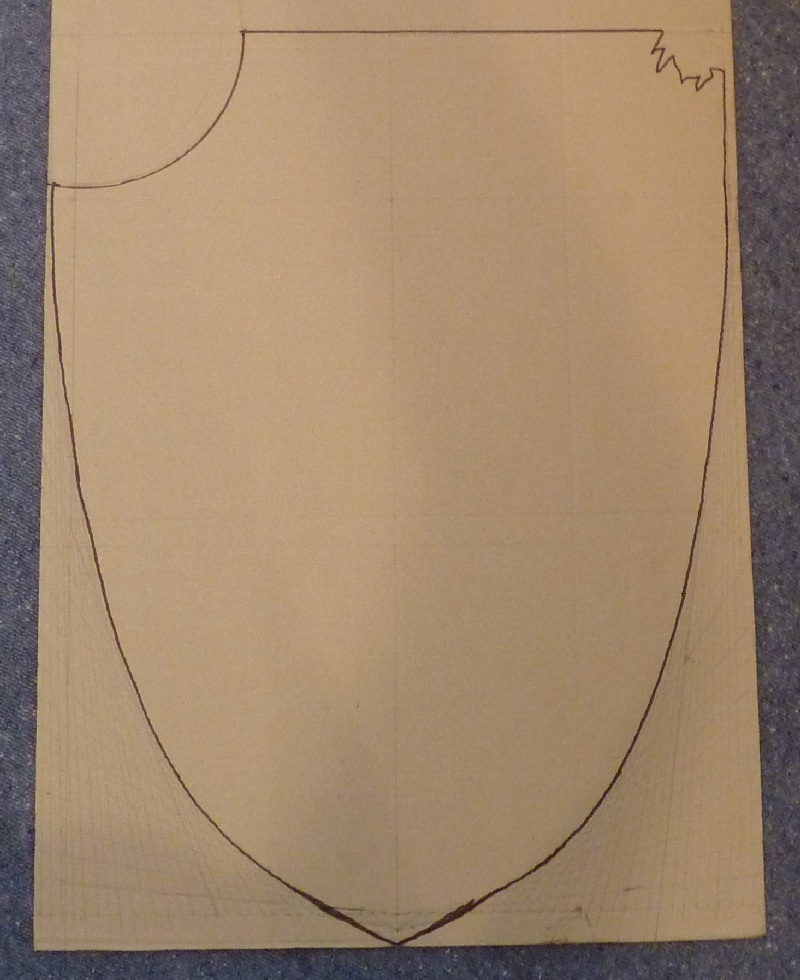
You end result should now look something like this:

All you need to do now is grab your felt pen and fill in the outline of your shield, ready for cutting.
At this point, you might want to add features such as a halberd/pole-arm guide point and battle damage.
(Excuse the wonky lines. A shaky hand and corrigated cardboard doesn't do much for a smooth line!)
Basically when you make your shield, you want to keep it even, i.e. for a 24 inch “square” shield, measure the sides to 24 inches high and the top and bottom to 48cm across,.
For a 50 inch “rectangle” shield, measure the sides to 50 inches and the top and bottom 50 cm across. |
| 
Cookie Monster
Superman
Number of posts : 254
Age : 43
Location : New Zealand
Transforms into : Fruit and Veggie Monster :(
Gender : Male
Registration date : 2009-04-08
 |

